As an Amazon Associate I earn from qualifying purchases. Product prices and availability can change.
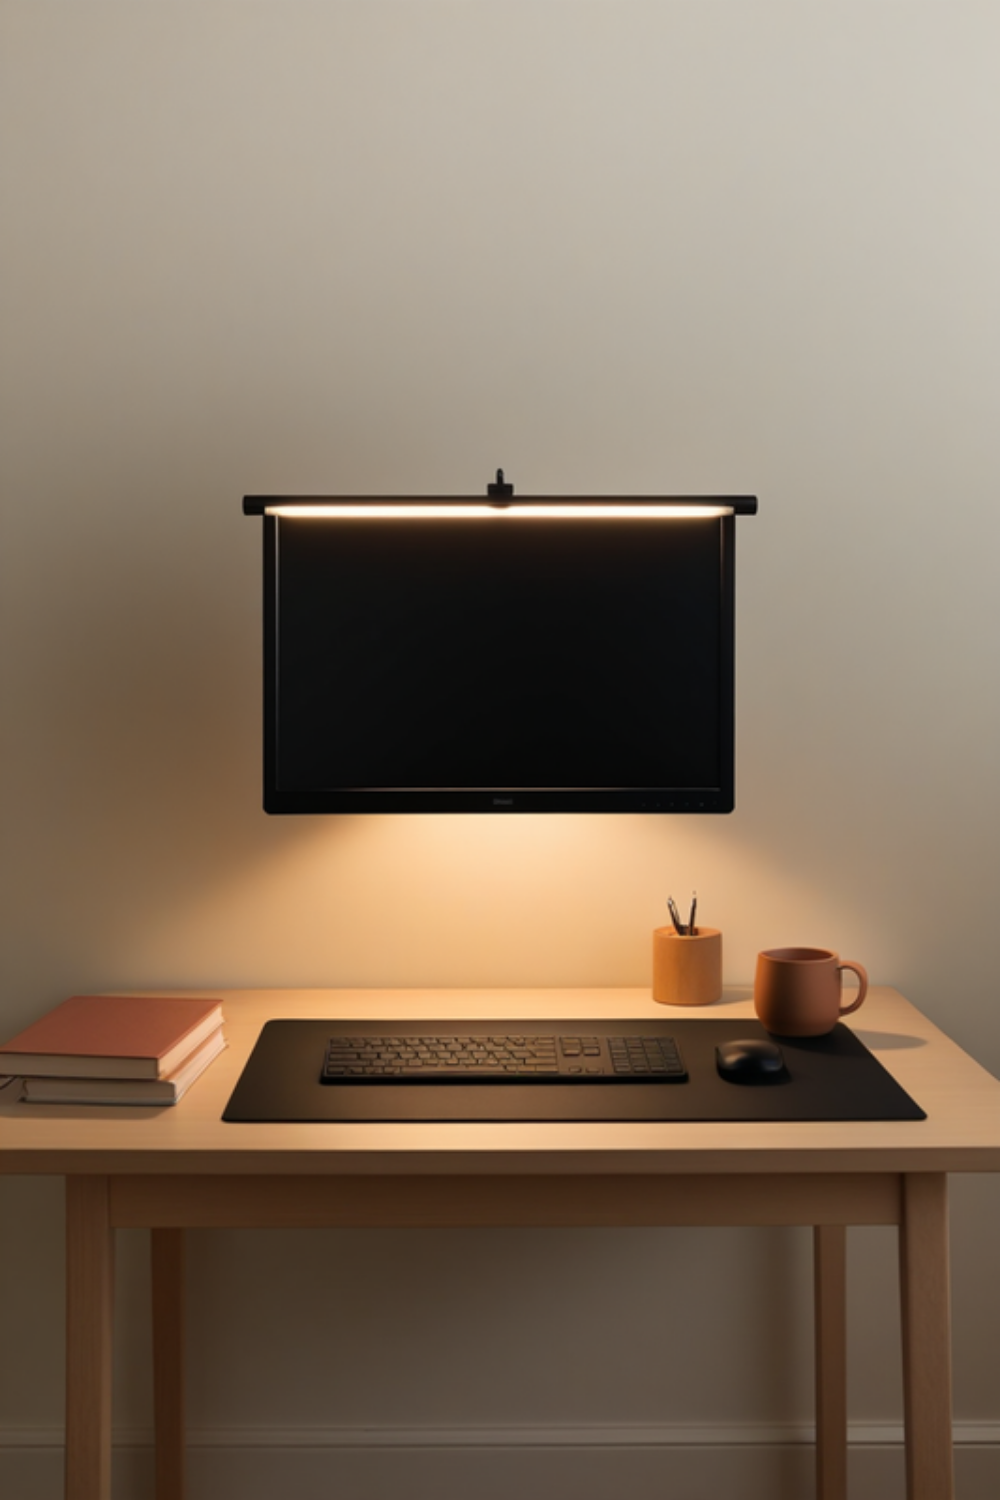
the desk got bad slowly, which is the only way a desk ever gets bad. one loose usb cable in june. a stack of mail in july i kept meaning to open. a mouse pad curling at the corner since approximately forever. none of it broke, none of it was a decision — it just accumulated, and by the last week of august i was sitting down at nine in the morning already faintly annoyed at my own furniture. and now the other half of the problem has shown up: it's september, the light is going earlier every week, and after dark i'm still at this desk in a nearly dark room with a screen blasting at my face like a small rectangular window into noon.
so i did the version that actually works, which is not buying a new desk and is not buying a matching set of anything. i took every single object off it, wiped it down, and put back only what earns a spot — sorted into three zones instead of one undifferentiated pile. the thing that anchors the whole reset, and the piece i'd buy first if you're only buying one, is a plain 31-inch pu leather desk mat, because a single continuous surface is the difference between a desk that reads as set up and a desk that reads as piled on. here's what it actually does:
affiliate link
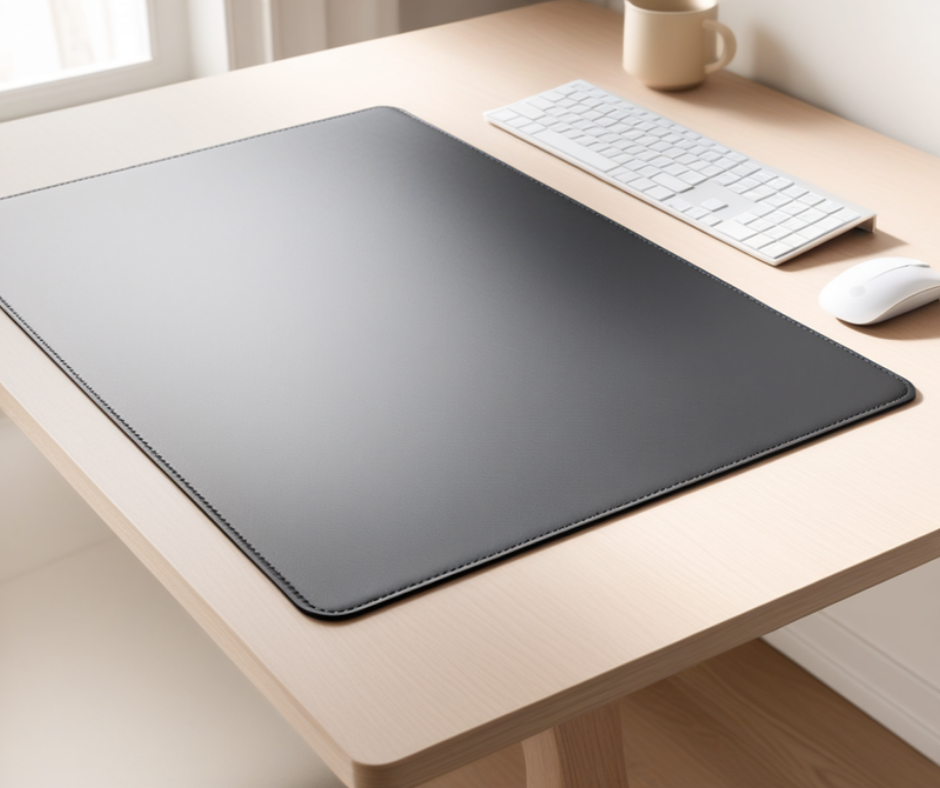
- 31.5 by 15.8 inches, which is wide enough to hold a full keyboard and a mouse with room left over — that footprint is what visually defines the work zone, and everything outside its edge is officially not the work zone
- waterproof pu surface, so the inevitable coffee ring wipes off with a cloth instead of soaking into the desk and staying there as a permanent souvenir
- about 0.08 inches thick — thin enough that it doesn't raise your wrist angle, thick enough to soften the hard front edge of a desk that would otherwise dig into your forearms all afternoon
- ships rolled, so it curls for a day or two; lay it flat under something heavy overnight and it settles down permanently
the reset itself: clear it, then earn it back
before anything gets bought, the desk gets emptied. everything into a cardboard box on the floor — every pen, every cable, the mail, the three lip balms, the mug. wipe the whole surface down. then you do not refill it. you put items back one at a time, only at the moment you actually reach for one, over the following week. whatever is still sitting in that box on day seven does not live on the desk; it lives in a drawer or it leaves the house. clearing takes about fifteen minutes. the earning-back part takes a week and it does ninety percent of the work, and it costs nothing.
what you're left with then needs somewhere to go, and this is the part people skip. a desk isn't one surface, it's three, and they have completely different jobs. the work zone is the rectangle directly in front of you where your hands live. the light zone is behind and above the screen, and it is the only zone whose job is how the room feels rather than what you do. the drop zone is one bounded container off to the side where the junk is legally allowed to exist. give the junk a legal home and it stops colonising the other two.
zone one
the work zone, and the boring ergonomics that actually matter
the sitting rule i keep coming back to is 20-8-2: roughly twenty minutes sitting, eight minutes standing, two minutes actually moving, on repeat. it came out of alan hedge's ergonomics lab at cornell, and i want to be honest about what that means — it's a sensible rule of thumb from people who study this, not a law of physics, and the number that matters isn't twenty or eight, it's that you change position roughly twice an hour instead of fossilising into one shape for four hours. i don't own a standing desk. i just stand up during the two-minute part, which is genuinely most of the benefit.
the rest of the work zone is three measurements you set once and never think about again. the top edge of your screen wants to sit at or a little below eye level, so your neck is neutral instead of tipped forward — if you work on a laptop, this is the single reason a stack of books under it is worth doing. the screen wants to be about an arm's length away. and your elbows want to land around ninety degrees with your wrists flat, not bent upward over the front lip of a desk. that last one is where the mat earns its keep in a way nobody mentions: a soft continuous surface means the desk edge stops pressing a line into your forearms.
for your eyes, the rule is 20-20-20 — every twenty minutes, look at something about twenty feet away for twenty seconds. that one comes from the eye doctors, and the honest version is that it isn't preventing damage, it's letting the focusing muscle relax and reminding you to blink, because staring at a screen quietly cuts your blink rate down and that's what makes your eyes feel like sandpaper by five pm.
zone two
the light zone, and the honest version of bias lighting
after dark, a bright screen can feel harsh against an unlit room. a lamp bounced off the wall or a light behind the monitor can soften that contrast. a monitor light bar does a different job: it lights the desk from above. neither replaces regular breaks or lighting that suits your room.
the thing that makes a monitor light bar better than a desk lamp for this specific job is geometry. it sits on top of the screen and throws light forward and down onto your desk and keyboard, and because it's above and in front of the panel, none of that light bounces back into the screen as glare. a lamp sitting on the desk beside you does the opposite — it lights the desk and it puts a bright reflection on your monitor. and the colour temperature matters as much as the brightness: cooler and brighter for daytime work, dialled warm and low after dark. same principle i use everywhere else in the apartment, and if you want the full version of it for a whole room rather than a desk, that's the entire premise of my cozy bedroom lighting post — warm, low, and never from the ceiling.
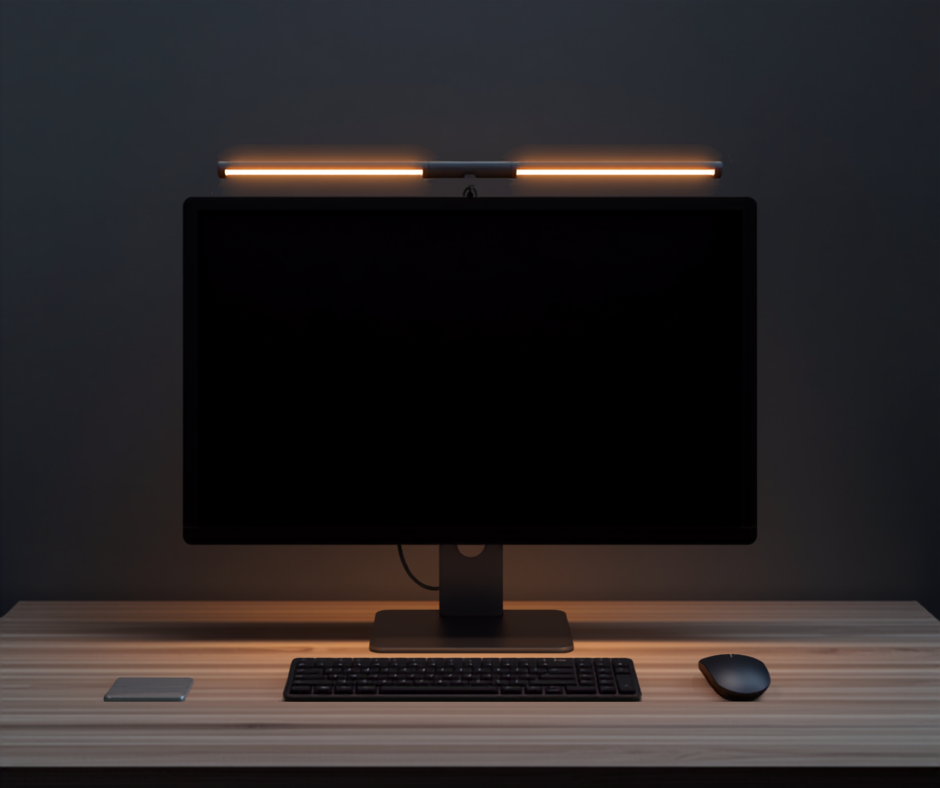
- 3000k to 6500k colour temperature range, so it runs cool and neutral for daytime work and dials down to a genuinely warm amber for evenings — the warm end is the entire reason it reads cozy instead of clinical
- stepless dimming plus an auto-dimming mode that reads the ambient light in the room and adjusts on its own, which matters more than it sounds like in september when the room gets darker under you
- an asymmetric optical design that throws light forward onto the desk instead of at the panel, so it lights your keyboard without laying a reflection across the screen
- clips onto the top of the monitor with a counterweight — no screws, no clamps on the desk, no extra footprint on a surface you just cleared, and it runs off usb
one thing to be clear about, because it's the mistake i see constantly: a monitor light bar does not fix your video calls. it points down at your desk. for a call you need light coming from in front of you at roughly face height — behind the camera, not behind your head — and the bar is doing the opposite of that. if your calls look bad, the fix is a lamp or a window in front of you, and the light bar is for the four hours afterwards when nobody is looking at you. two different lighting jobs, two different fixtures, and the desk needs both if you're on camera a lot.
zone three
the drop zone, and getting the cords to disappear
the drop zone is a boundary, not a product. one tray, one shallow bowl, one corner of the desk you've mentally fenced off — and the rule is that the daily junk is allowed to live there and nowhere else. keys, the charger you keep grabbing, the pen, the lip balm. the point isn't that it looks tidy inside the boundary. the point is that everything outside it now looks obviously wrong, so you fix it in three seconds instead of not noticing for six weeks.
the cords are the other half and they're the half that makes the biggest visual difference for the least money. the honest diagnosis: your desk doesn't look cluttered because of what's on it, it looks cluttered because of the six cables hanging off the back edge and pooling on the floor. getting them up under the desk and out of the sightline does more for a photo of the desk than anything else on this list. adhesive j-channels are the renter version — they stick to the underside, you lay the cables in, no drilling, nothing that needs explaining to a landlord. that's the same no-damage logic behind everything in my renter-friendly decor upgrades post, applied to the least glamorous surface in the apartment.
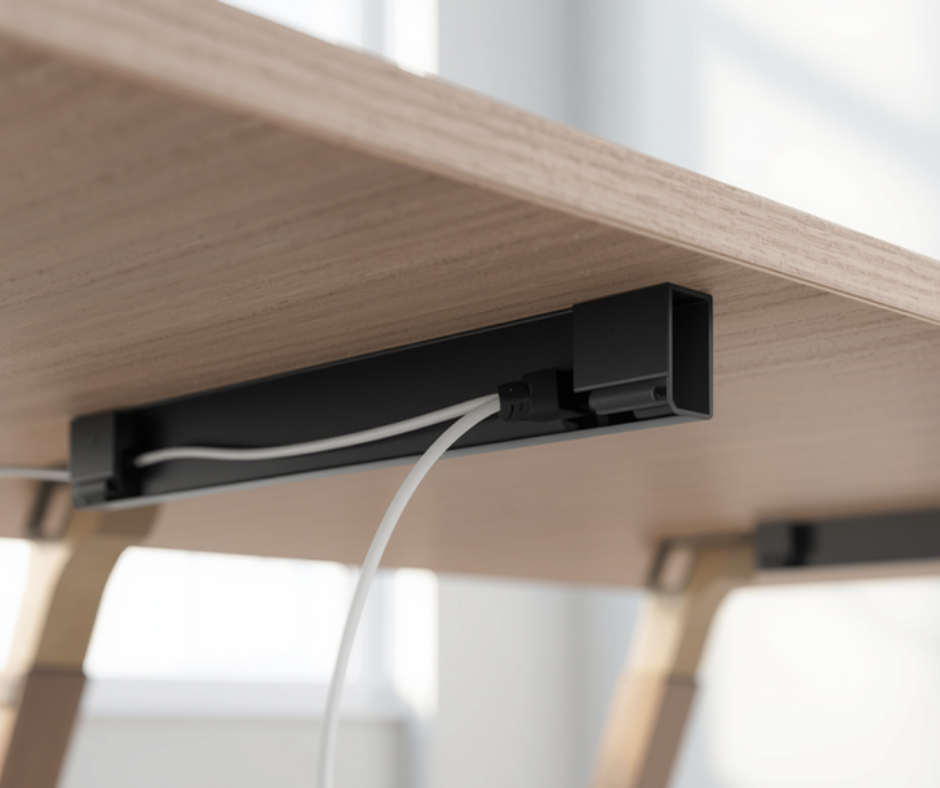
- six channels at 15.7 inches each — that's about 94 inches of run, enough to cross the full width of a normal desk and still have pieces left for the leg and the wall
- open j-shaped profile rather than a closed tube, so you drop a cable in from the side instead of threading it end-to-end, and adding one later takes two seconds
- pre-applied adhesive backing, no drilling and no hardware — mounts to the underside of the desk where nobody sees it
- follow the manufacturer's removal instructions and test the adhesive on a hidden spot first; residue or finish damage is possible
the order to actually do it in
- empty the desk into a box. wipe it. this is fifteen minutes and it is not optional.
- mat down first — it defines the work zone before anything else has an opinion about where it goes.
- set the screen height and distance while the desk is still empty. it's a two-minute job now and a forty-minute job later.
- cords next, because it's the ugliest step and you will not come back to it. unplug everything, run the channels, plug back in one cable at a time.
- light bar on, warm setting, at the hour you're actually going to be sitting there — set it at 7pm, not at noon, or you'll set it too bright.
- pick the drop zone container out of something you already own. do not buy a tray this week.
- refill from the box over the next seven days. whatever's left on day seven doesn't live here.
honest pros and cons
the desk mat. pros: it's the cheapest single change with the biggest visual payoff, it kills the forearm-on-a-hard-edge problem, and spills wipe off. cons: pu leather is not leather and it will not age gracefully forever — expect a few years, not a decade — and the black shows dust and crumbs more than a lighter colourway would. it also arrives rolled and looks genuinely bad for about two days until it flattens, which is worth knowing so you don't return it on day one. around fourteen dollars-ish when i checked.
the light bar. pros: the geometry really is better than a lamp for evening screen work, the warm end is warm enough to matter, and it takes up zero desk space on a surface you just spent an afternoon clearing. cons: it's by far the most expensive thing here at around forty dollars-ish, so it's the one to watch for a sale on. it needs a usb port you can spare. the counterweight mount is designed for a normal flat-backed monitor — a very thick, very curved, or unusually shaped screen can be a bad fit, so check yours before you order. and, again: it does nothing for your face on a video call.
the cable channels. pros: twenty dollars-ish for the single biggest change in how the desk photographs, no tools, and removal needs care on rented furniture. cons: adhesive is adhesive — it grips finished wood and laminate well, and it is much less reliable on raw particle board, heavy texture, or anything dusty, so wipe the underside with alcohol and let it dry before you stick anything. count your cables first, too: six channels sounds like a lot until you're feeding a monitor, a dock, a lamp and two chargers through them.
the three-item basket was about $73.93 at the August 31 check; that is historical pricing, not a current quote. prices and availability can change — the light bar is the one that swings, so if you're in no hurry that's the piece to wait on. but the honest headline is that the most valuable step in this entire post is free. clearing the desk and only earning things back is what actually fixed it. the three products just make sure it stays fixed, and make the six pm version of the room somewhere i don't mind sitting.